Sourdough Bread
In May 2020, I was on a Saturday run with the Dick Pond Lisle Trailheads, chatting with Adam. Turns out he makes sourdough bread. He’s also in Information Technology. (That makes several IT breadmakers I know; I guess it’s a thing).
Anyway, two years later my pandemic sourdough is still going. I’ve discovered that it’s fairly hard to kill. It will keep for weeks in the fridge, and wakes back up in an afternoon. Based on Adam’s recipe graciously translated from the Polish, the following commentary is my sourdough routine.
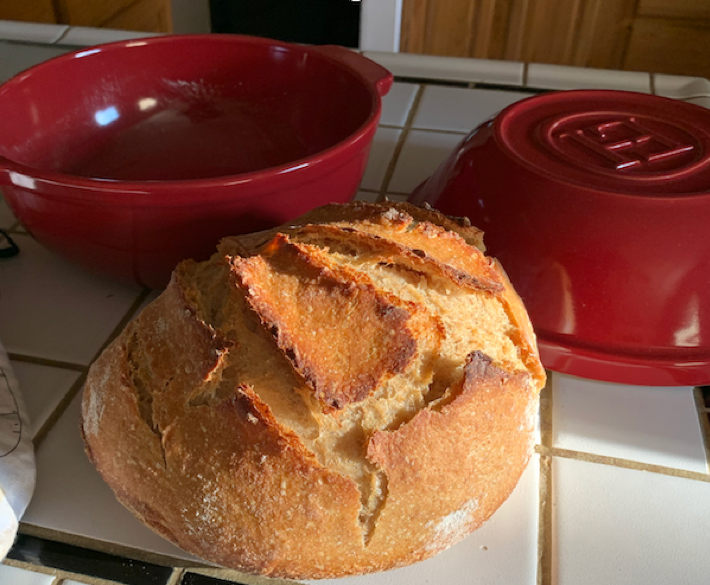
A dutch oven is necessary; the cover keeps the steam in while the bread is baking. I bought an Emile Henry bread pot, which is great for shaping the loaf. It’s expensive, but between a Kitchenaid mixer and a bread pot, I’d go for the pot.
For flour, I recommend ancient-grain einkorn. The flavor is amazing, and the gluten is much less challenging to most people’s digestive systems. I’ve had several gluten-sensitive people report that einkorn gluten doesn’t trigger nearly the reaction of commercial bread made with durum wheat. A couple of sources: einkorn.com and jovialfoods.com. If you don’t use ancient-grain flour, you may need to adjust the liquid.
For butter (you have to eat this bread with butter!), I use Kerrygold Irish butter.
The bread also makes wonderful French toast, toasted cheese, and sandwiches.
I usually make two loaves while I’m at it. This recipe is for one loaf, but the starter amounts provide enough for two. If I don’t give away the second loaf, I slice it the next day and freeze it.
No-Knead Sourdough Bread (1 loaf)
Ingredients
- Sourdough starter (see the notes on making starter from scratch)
- Einkorn all-purpose white flour
- Einkorn wheat flour
- Sea salt
Utensils
- A 5kg scale capable of measuring to ½ a gram accuracy.
- Emile Henry bread pot (or similar)
- A bread lame (“LAHM”) - a razor or very sharp knife for scoring the loaf before baking
- rubber scraper
- a couple of medium mixing bowls
- strong mixing spoon
- a teaspoon measuring spoon
- A big sharp bread slicing knife
Schedule
Baking-Day-minus-one, morning (or early afternoon, latest)
- Remove starter from fridge, measure out 50g (throw the rest away), and feed it 50g flour + 50g water.
- Let it rise in a warm place, at least 75F or warmer.
Baking-Day-minus-one, late evening
Make the levain, or “proto-bread”:
- Measure 50g of your starter into a medium bowl.
- (Then measure another 50g starter, 50g water, 50g flour into another bowl, mix it up, cover it and put it in the fridge for next time).
- Add 100g white flour (Einkorn all-purpose).
- Add 65g whole wheat flour (Einkorn Whole Grain Organic).
- Add 100g water.
- Mix, shape with a rubber scraper, cover with a towel, and let rise overnight.
Baking-Day, morning (about 7:30 am)
- Move the levain to a large mixing bowl.
- Add 210g white flour.
- Add 160g whole wheat flour.
- Add 225g water.
- Add 2 teaspoons sea salt.
- Mix everything and let rise 4 hours in a warm place. It should double in size.
Baking-Day, Noon-ish
Rub lots of flour into a cloth-lined proofing basket (or clean dishtowel in a mixing bowl), gently bumping the extra flour onto the work surface.
Turn the bread onto work surface; a rubber scraper helps get it out of the bowl. Stretch and fold 8 to 12 times (or more if needed to make it smooth), ¼ turn after each fold; whenever it starts to stick to your hands, grab some more flour. The last couple of folds should be like an envelope, “buttoning-up” the loaf into a smooth round shape, pinching the folds and any seams together.
Smooth just enough flour onto pinched side to dry it a bit. Lay the loaf into the floured cloth in the bowl or proofing basket, pinched side down, smooth side up. Cover and let rise for 3 or so hours.
Baking-Day, about 3:30 p.m.
Check on the progress of the proofing. You should aim to get the first loaf in the oven before the bread begins to pull apart, indicating “over-rising”.
- Place the bread pot in oven and preheat to 500F.
- Carefully but quickly remove the loaf from the proofing basket, keeping the bottom side down.
- Carefully place the loaf in the (HOT!) bread pot, bottom side down. Dump it out and drop it in the pot; don’t hold the loaf in your hands for any length of time, or you’ll lose a lot of rise. A rubber scraper helps center it in the pot if needed.
- Score the top of the loaf to taste with a lame or very sharp knife; a deep four-square pattern is effective, with vertical gashes on sides. Gashes should be about ½ inch deep.
- Cover the pot and place back in the oven. Reduce heat to 450F.
- Bake for 36 minutes.
- Uncover the pot, bake 3 more minutes to brown the top.
- Let cool.
If you bake two loaves, leave oven at 450F for the 2nd loaf.
Making sourdough starter
Amazingly, all you need for sourdough starter is flour, water, and patience. It can take up to a couple of weeks to get a good vigorous starter going, but it usually happens much sooner.
“Bubble and double” is the goal for your starter. Make a batch of ½ whole wheat and ½ white flour for “starter feeder”—a couple cups of each.
Mix 75g each of “starter feeder” and water. Cover and put in a warm place.
Within 24 hours, measure 50g into a new bowl, add another 50g each of “starter feeder” and water. (Throw the rest away).
Keep doing this every day—keeping 50g and adding 50g of “starter feeder” and 50g water) until you start to see bubbles.
When you see bubbles, switch to twice a day. At this point, it should only take a couple of days to see your starter bubbling and doubling in size at each feeding.
When “bubble and double” happens, you’re ready to make bread! I usually start the bread-making in the evening (see the schedule in the recipe).
The recipe instructs you to feed your starter after pulling some out for bread and then cover and refrigerate. Starter is relatively hard to kill; it can be fine in the fridge for a couple of weeks or more. Just feed it before refrigerating.
When you want to make bread from your refrigerated starter, pull the starter out and feed it (that is, mix 50g of starter, “starter feeder” and water) on the morning you’re planning to start some bread. I use very warm water when feeding it from the fridge, to help wake it up. If it “bubbles and doubles” by the evening, you’re ready to go. If not, give it one more day, feeding it that evening and the next morning, and that should do it.
Questions or comments? Email sourdough@walquist.net!